It's Christmas Eve and here I sit in my hotel room watching National Geographic, reading blogs, thinking about working out in the fitness center and then crawling into bed later tonight. Anyone else spending Christmas Eve like this? Let me tell you... IT IS THE LIFE. You should see the view out my window. It's this beautiful parking lot. You really don't know what you're missing.
Although, I do have to say that I was amongst palm trees yesterday... and today I get to see my snow in New England.
One of the blogs that I ran across is Ryle-isms post talking about the cost of music. I have to say that I greatly agree that music costs too much.
Something that makes me wonder is that the middle man has been pulled out of the sale of much of the music industry; especially that of direct sales like iTunes. Why does the cost remain as high as it does?
I love music... I think that most (if not all) people love some sort of music. Yet, I also love having money in my wallet. Money in my wallet comes first. The music industry is a luxury while having money is a security.
To increase sales then lower the cost.
Showing posts with label music. Show all posts
Showing posts with label music. Show all posts
24 December 2009
22 December 2009
Creating a Ringtone on the iPhone - FREE
You do not need to buy any apps to create a ringtone. Everything that you need is already included on an up-to-date iPhone.
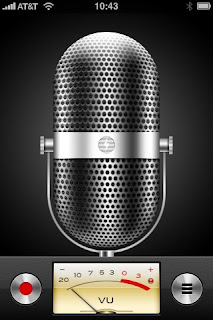
If you have an iPhone and it is up to date then you've got the Voice Memos app that should have been downloaded.
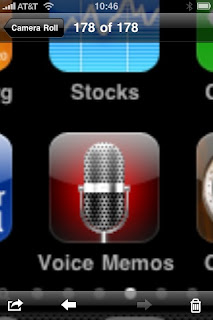
1) You can record anything through that app.
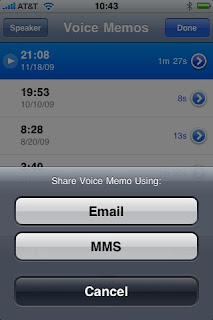
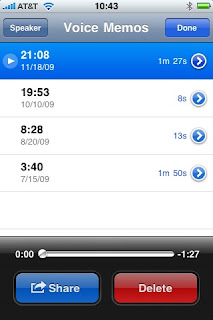
2) After you have made your desired recording then email it to yourself. Once you have emailed it then save it to your computer. It will automatically be in an .m4a format.
3) From here you can do one of two things to add the file to your iTunes library:
a) From the folder where the file was saved you can drag file from its saved folder and drop the that file into iTunes... or
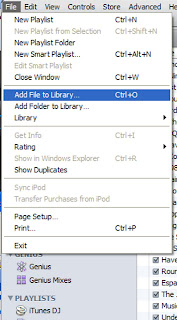
b) You can go to iTunes and press on FILE then ADD FILE TO LIBRARY. Go to the folder where the file was saved and select that file then press OPEN.
4) Now go to the MUSIC section of iTunes and find the file you have just added to that library.
(From here you can follow the steps to create snippets from your music library. The snippets and recordings must be 40 seconds or less..)
5) Write down the starting and stopping point of the section of the recording that you want to create.
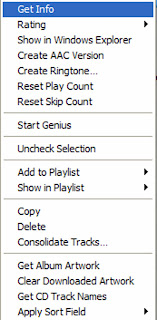
6) If you're using a PC then right click on the recording in your iTunes library and select GET INFO. If you're using a Mac then click on FILE then GET INFO.
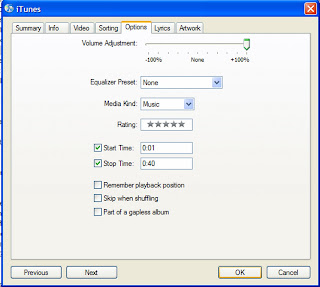
7) Choose the OPTIONS tab from the top. If you want to increase the volume of your recording then increase or decrease the volume through the VOLUME ADJUSTMENT section (with a ringer you probably want it louder). Enter the START TIME and STOP TIME in their corresponding boxes. Ensure that you check the boxes to the left of those times. Then click OK.
8) Select the recording again
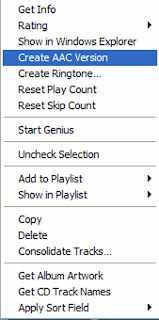
a) on a PC right click the recording and select create AAC version.
b) Mac users click on the recording then at the top click on ADVANCED then create AAC version.
9) A second version of the recording should appear with the iTunes library. Play that second version to ensure that it sounds the way you want it to sound as a ringtone.
10) The format of the second version now needs to be changed so that it will appear as a ringtone. Navigate to the folder where the file is stored.
a) PC users right click the file in iTunes and select SHOW IN WINDOWS EXPLORER.
b) Mac users click on the file in iTunes and at the top select FILE then SHOW IN FINDER.
11) Copy the new .m4a file (PC users Control+C or Mac users Command+C) and paste it (Control+V or Command+V) into the same folder so that a third version appears. (If you're using Windows XP and the file extension does not appear then go to TOOLS then FOLDER OPTIONS then VIEW and uncheck Hide extensions for known file types. On Vista: ORGANIZE then FOLDER and SEARCH OPTIONS and uncheck Hide extensions for known file types.)
12) Now, with the third version change the file extension from .m4a to .m4r. If you would like you can rename the file as well. NOTE: ALL hyphens and/or other symbols must be removed from the name.
13) At this time go back to iTunes and delete the previously created AAC file (from step 8). NOTE: If this action is not performed then iTunes might not accept the new ringtone.
14) Go back to the folder with the new ringtone file (.m4r) and drag and drop it into iTunes.
15) Sync your iPhone as usual. Make sure that the SYNC RINGTONES box is checked in the RINGTONES tab.
16) Go ahead and change settings to your new ringtone.
If you have an iPhone and it is up to date then you've got the Voice Memos app that should have been downloaded.

1) You can record anything through that app.

2) After you have made your desired recording then email it to yourself. Once you have emailed it then save it to your computer. It will automatically be in an .m4a format.


3) From here you can do one of two things to add the file to your iTunes library:
a) From the folder where the file was saved you can drag file from its saved folder and drop the that file into iTunes... or
b) You can go to iTunes and press on FILE then ADD FILE TO LIBRARY. Go to the folder where the file was saved and select that file then press OPEN.

4) Now go to the MUSIC section of iTunes and find the file you have just added to that library.
(From here you can follow the steps to create snippets from your music library. The snippets and recordings must be 40 seconds or less..)
5) Write down the starting and stopping point of the section of the recording that you want to create.
6) If you're using a PC then right click on the recording in your iTunes library and select GET INFO. If you're using a Mac then click on FILE then GET INFO.

7) Choose the OPTIONS tab from the top. If you want to increase the volume of your recording then increase or decrease the volume through the VOLUME ADJUSTMENT section (with a ringer you probably want it louder). Enter the START TIME and STOP TIME in their corresponding boxes. Ensure that you check the boxes to the left of those times. Then click OK.

8) Select the recording again
a) on a PC right click the recording and select create AAC version.
b) Mac users click on the recording then at the top click on ADVANCED then create AAC version.

9) A second version of the recording should appear with the iTunes library. Play that second version to ensure that it sounds the way you want it to sound as a ringtone.
10) The format of the second version now needs to be changed so that it will appear as a ringtone. Navigate to the folder where the file is stored.
a) PC users right click the file in iTunes and select SHOW IN WINDOWS EXPLORER.
b) Mac users click on the file in iTunes and at the top select FILE then SHOW IN FINDER.
11) Copy the new .m4a file (PC users Control+C or Mac users Command+C) and paste it (Control+V or Command+V) into the same folder so that a third version appears. (If you're using Windows XP and the file extension does not appear then go to TOOLS then FOLDER OPTIONS then VIEW and uncheck Hide extensions for known file types. On Vista: ORGANIZE then FOLDER and SEARCH OPTIONS and uncheck Hide extensions for known file types.)
12) Now, with the third version change the file extension from .m4a to .m4r. If you would like you can rename the file as well. NOTE: ALL hyphens and/or other symbols must be removed from the name.
13) At this time go back to iTunes and delete the previously created AAC file (from step 8). NOTE: If this action is not performed then iTunes might not accept the new ringtone.
14) Go back to the folder with the new ringtone file (.m4r) and drag and drop it into iTunes.
15) Sync your iPhone as usual. Make sure that the SYNC RINGTONES box is checked in the RINGTONES tab.
16) Go ahead and change settings to your new ringtone.
Subscribe to:
Posts (Atom)